iPhone & iPad (Apple Mail)
Set up your mailbox in the Mail app on iPhone and iPad – via QR code profile or manually – and remove the old account

On iPhone and iPad there are two ways: the profile from your admin sets everything up automatically and you only enter the password. Without a profile you enter the values by hand. The steps apply to iOS and iPadOS 26; on older versions the path is Settings → Mail → Accounts.
Option 1: Profile via QR code (fastest)
Get the QR code or link
Your admin opens Set up for your mailbox in SimpliServ and shows you the QR code – or sends you the instructions with the link in a message.
Download the profile
Scan the QR code with the Camera (or open the link in Safari) and tap Allow.
Install the profile
Open Settings. At the very top you'll see Profile Downloaded – tap it and then Install. The profile is shown as "Not Verified"; that's normal.
Enter the password
Enter your mailbox password and tap Next or Done. The mailbox appears in the Mail app right away.
Option 2: Set up manually
Add an account
Settings → Apps → Mail → Mail Accounts → Add Account. Enter your email address and tap Next.
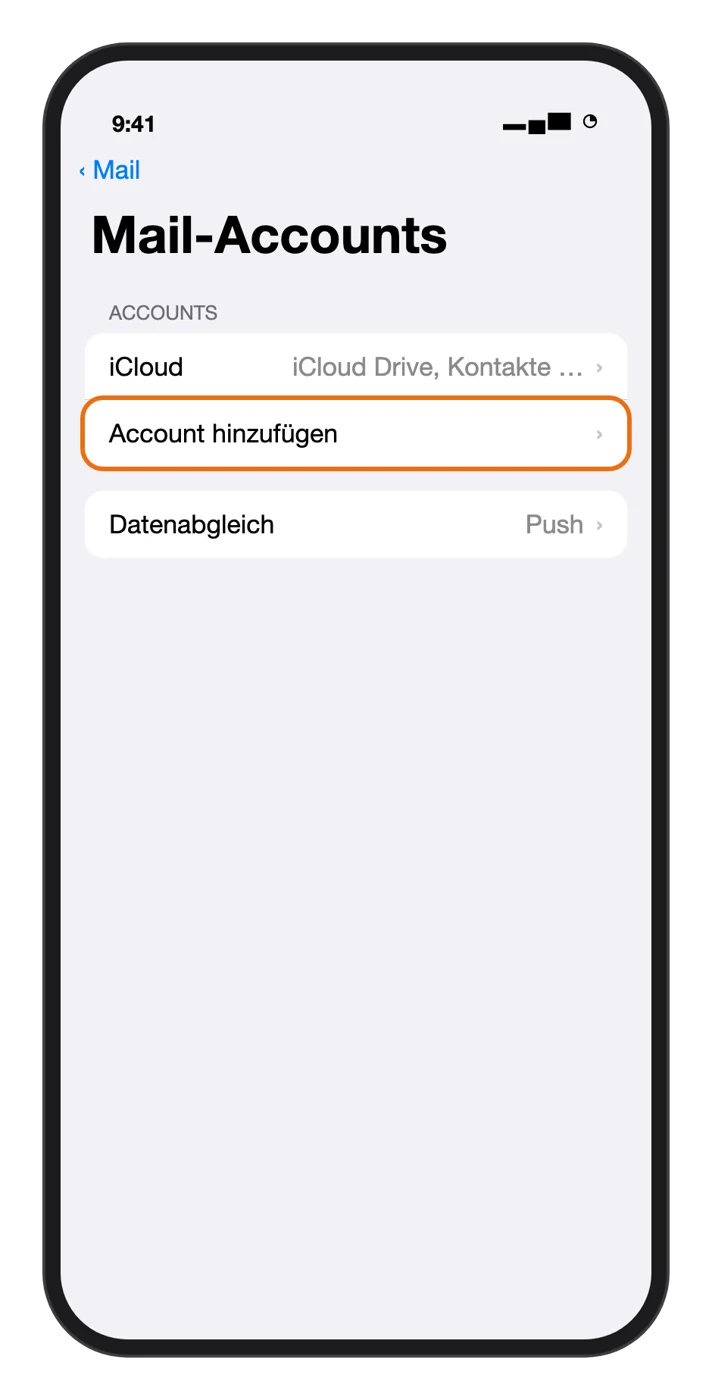
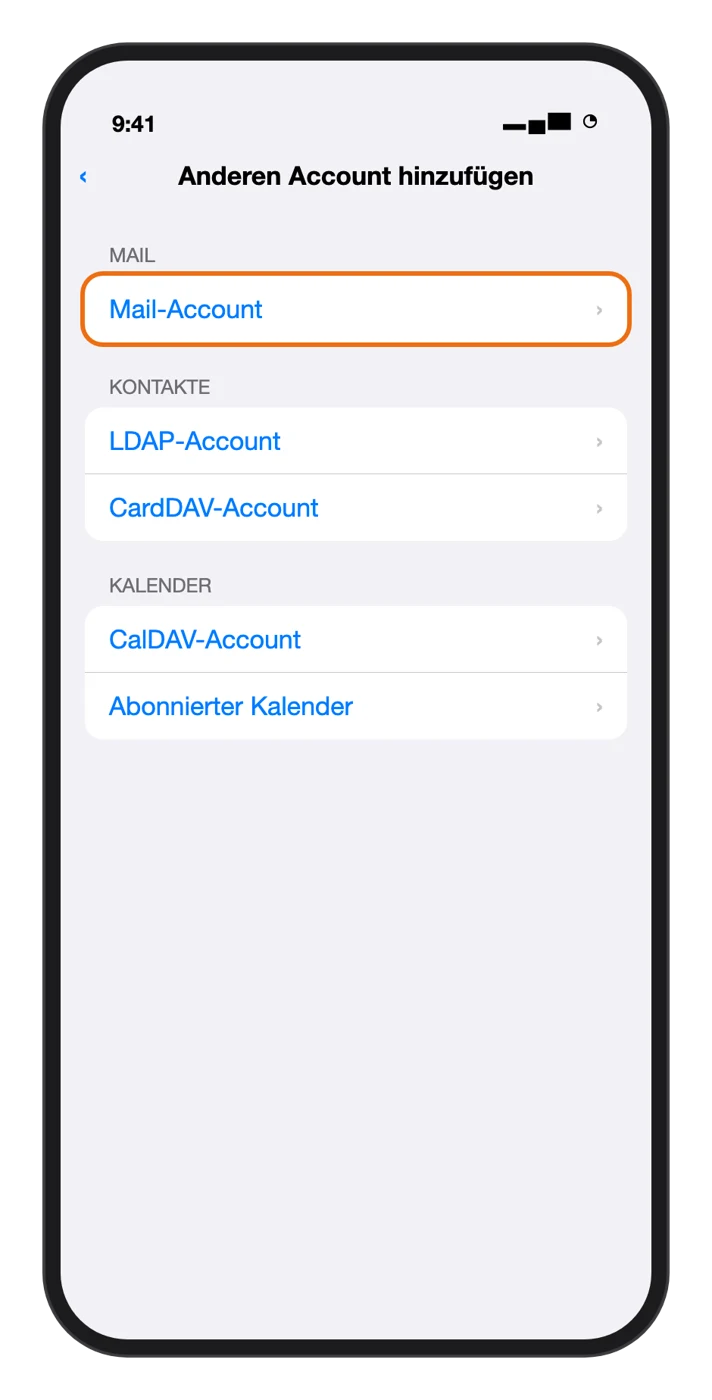
Choose another account
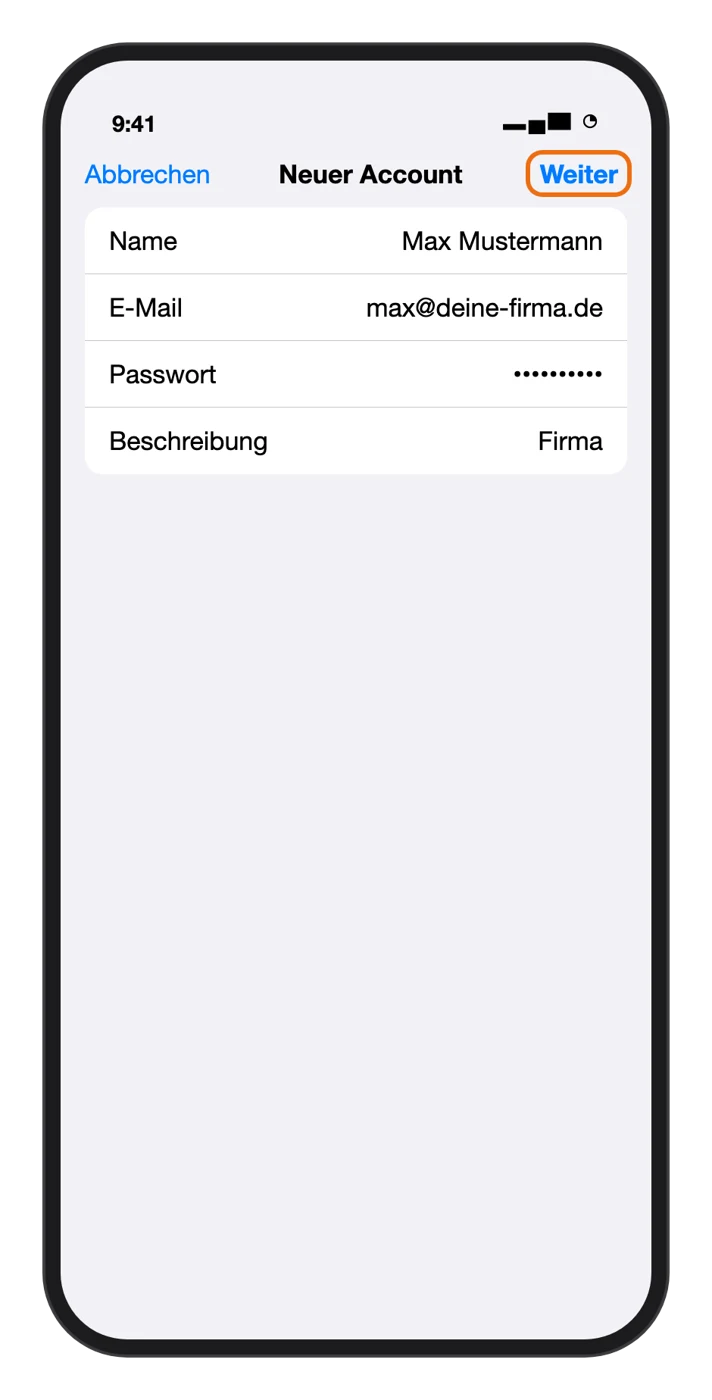
Tap Add Other Account and then Mail Account. Enter Name, Email, Password and a Description (e.g. "Work") and tap Next.
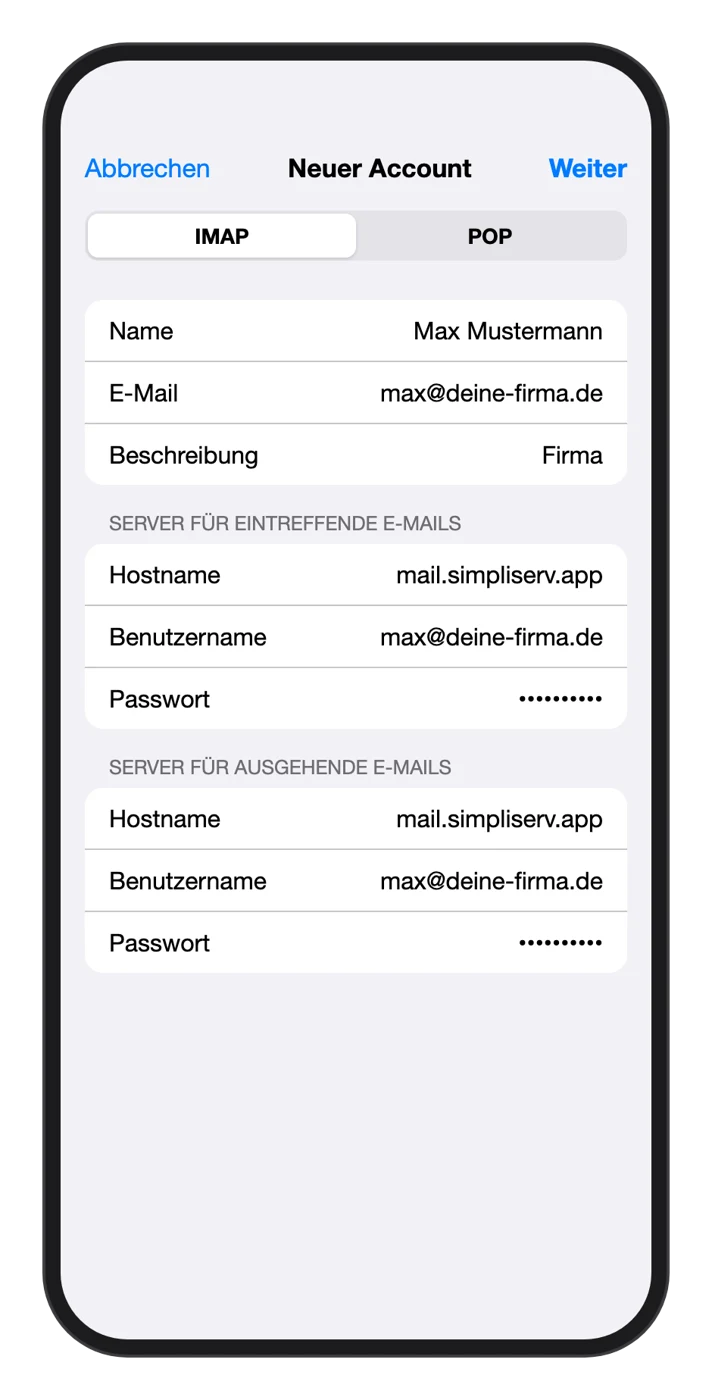
Choose IMAP and enter the server
Select IMAP at the top – not POP. Under Incoming Mail Server and Outgoing Mail Server enter in each case:
- Host Name:
mail.simpliserv.app - User Name: your full email address
- Password: your mailbox password
Tap Next and, after the check, Save.
No POP
Choose IMAP during setup. With POP, emails you read or delete on the iPhone will later be missing on your computer and in webmail. More in the overview.
The iPhone finds the ports itself (993 for incoming, 465 for outgoing mail). If sending doesn't work, check them under Settings → Apps → Mail → Mail Accounts → (your account) → Account → Outgoing Mail Server → mail.simpliserv.app: Use SSL on, Server Port 465.
Signature and default account
- Signature: Settings → Apps → Mail → Signature.
- Default Account (the address new emails are sent from): Settings → Apps → Mail → Default Account.
Switching from your old mail server
Set up the new account
Set up the SimpliServ mailbox as described above before you remove the old one. Open the Mail app and check that your folders and older emails are there – we copy them over from the old server during the move.
Save emails stored only on the device (POP only)
If the old account was set up as POP, some emails exist only on the iPhone. Open them in the old account, tap Select, mark them, tap the folder icon and move them to a folder of the new account.
Delete the old account
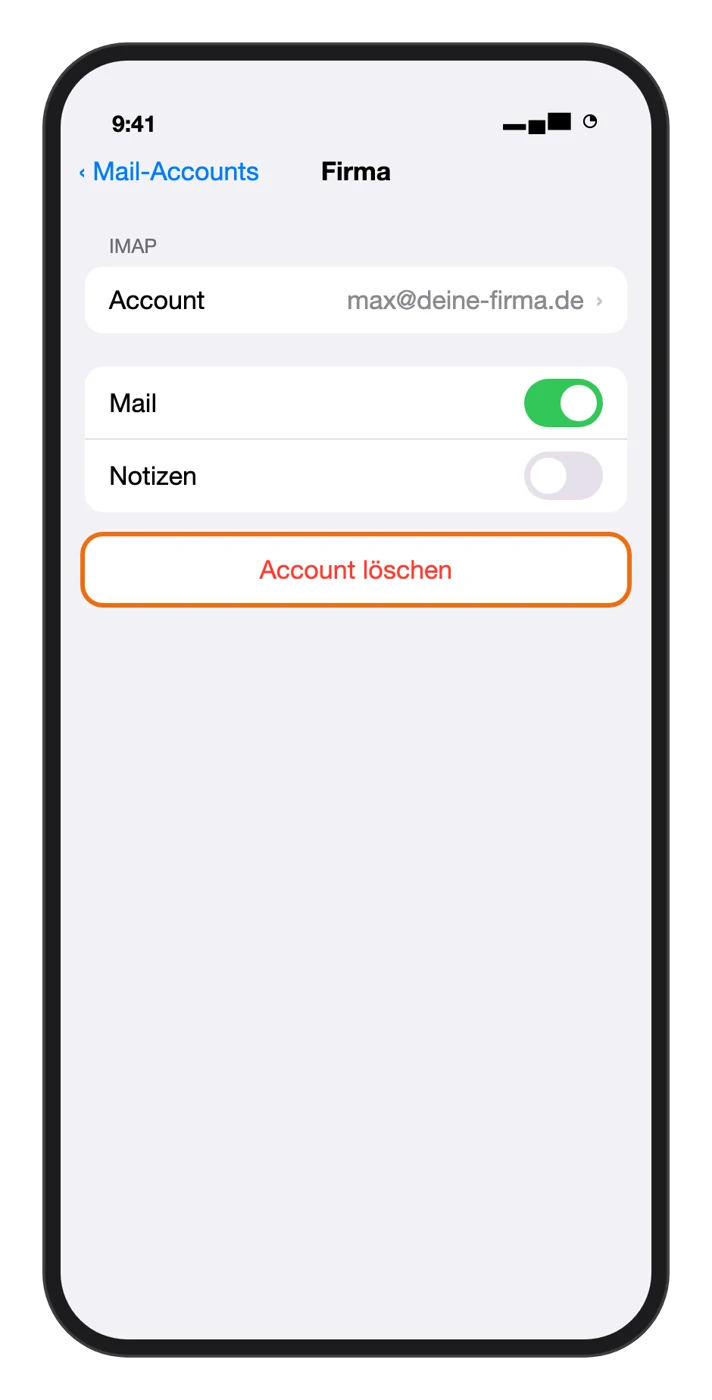
Settings → Apps → Mail → Mail Accounts → old account → Delete Account. The emails on the server are not affected; the iPhone just forgets the account. Then set the Default Account to the new account.
Related topics
How is this guide?